
hayward pool pump installation instructions
Hayward Pool Pump Installation⁚ A Comprehensive Guide
This guide provides a step-by-step approach to installing your Hayward pool pump․ We cover safety precautions, location selection, tool requirements, piping, wiring, priming, troubleshooting, and post-installation checks․ Proper grounding and adherence to electrical codes are crucial for safety․ Remember to consult your Hayward manual for specific model instructions․
Pre-Installation Checklist and Safety Precautions
Before beginning the Hayward pool pump installation, ensure you have all necessary tools and materials․ This includes pipe wrenches, screwdrivers, electrical tape, and plumbing sealant․ Review the Hayward pump’s specific installation manual for your model number; it contains crucial details and diagrams․ Always disconnect the power supply to the pool’s electrical system before commencing any work․ This prevents electrical shock and injury․ Wear appropriate safety gear, including safety glasses and work gloves, to protect against potential hazards․ Verify the pump’s voltage and amperage ratings match your electrical system’s specifications․ Improper electrical connections can cause serious harm or damage your equipment․ Ensure sufficient space around the pump for maintenance and access․ Crowding components makes servicing difficult․ Check local building codes and regulations regarding pool equipment installation․ These regulations often dictate specific requirements for electrical bonding and grounding․ Failing to adhere to these codes can lead to severe consequences․
Choosing the Right Location for Your Pump
Selecting the optimal location for your Hayward pool pump is critical for efficient operation and easy maintenance․ Ideally, position the pump below the waterline of your pool to facilitate self-priming and minimize suction lift․ Proximity to the pool reduces the length of piping, minimizing friction losses and improving overall system efficiency․ Ensure the chosen location provides ample space around the pump for access to all components during routine maintenance and repairs․ Avoid placing the pump in damp, poorly ventilated areas, as this can lead to overheating of the motor․ Consider the accessibility of the electrical supply․ Locate the pump close enough to the power source to avoid excessively long wiring runs, but ensure the wiring is protected from potential damage․ If you have an above-ground pool, consult the NSPI-4 Article V guidelines for safe and proper equipment placement․ These guidelines often specify requirements for safe access and positioning to prevent accidents․ Proper placement enhances system longevity and reduces the risk of operational issues․ The chosen location should also be easily accessible for periodic inspections and necessary repairs․
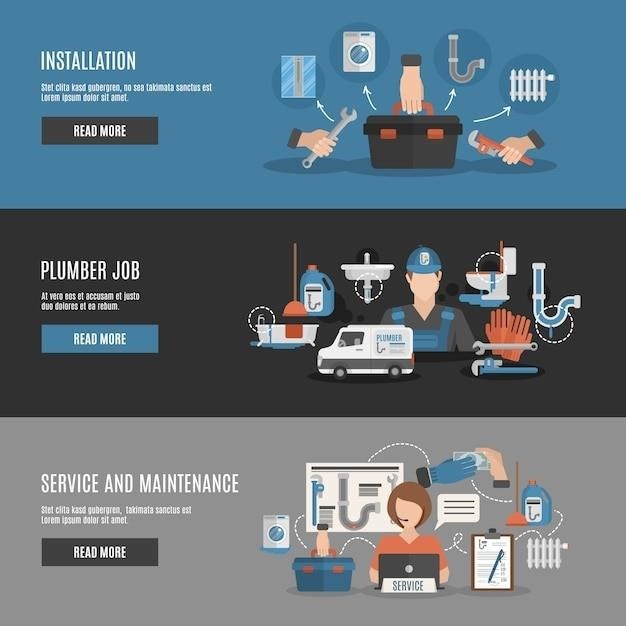
Essential Tools and Materials for Installation
Before commencing your Hayward pool pump installation, gather the necessary tools and materials․ This ensures a smooth and efficient process․ Essential tools include pipe wrenches (various sizes to accommodate your piping), a level for accurate placement, a voltage tester to verify electrical safety, and screwdrivers (Phillips and flathead) for various fastening tasks․ You’ll also need plumbing tape (Teflon tape) to create watertight seals on pipe connections, and potentially PVC cement and primer if you are working with PVC piping․ A bucket or container is useful for handling water during priming․ Safety glasses and work gloves are mandatory to protect yourself from potential hazards․ Depending on your specific Hayward pump model, additional tools may be needed; consult your model’s instruction manual for a comprehensive list․ Remember to check the electrical requirements for your pump; you might need wire strippers and crimpers if you need to connect wires․ Having all the necessary tools and materials readily available will significantly streamline the installation process and minimize interruptions․
Step-by-Step Installation Process⁚ Connecting Pipes and Wiring
Begin by carefully reviewing your Hayward pump’s installation diagram․ Ensure the pump is positioned correctly, adhering to the manufacturer’s guidelines regarding location and elevation relative to the pool waterline․ Using the appropriate pipe wrenches, connect the suction and discharge pipes securely to the pump’s inlets and outlets․ Apply Teflon tape to the threads of all pipe connections to ensure watertight seals, preventing leaks․ Double-check the tightness of all connections to avoid future problems․ Next, turn your attention to the electrical connections․ Before making any electrical connections, switch off the power supply to the pump circuit․ Using wire strippers (if necessary) and following the wiring diagram provided with your pump, connect the wires to the pump’s terminal box․ Ensure that the grounding wire is correctly connected to meet local electrical codes․ After completing the wiring, carefully tuck away any excess wiring to maintain a neat and organized installation․ Before turning on the power, visually inspect all connections for any errors or potential issues․ Once you’re satisfied, carefully switch the power back on and proceed to the priming stage․
Electrical Connections and Grounding⁚ Crucial Safety Steps
Electrical safety is paramount during Hayward pool pump installation․ Before commencing any electrical work, always disconnect the power supply to the circuit․ This critical step prevents accidental electrocution․ Carefully examine the wiring diagram provided with your specific Hayward pump model․ Match the wires to their corresponding terminals in the pump’s junction box․ Use wire nuts or other suitable connectors to secure the connections, ensuring they are tight and free from any loose strands․ Never force connections; if a wire doesn’t fit easily, double-check the wiring diagram․ Grounding is essential to protect against electric shock․ Connect the grounding wire securely to the designated grounding terminal on the pump and to the pool’s grounding system, following all local electrical codes․ This ground connection provides a safe path for stray electrical current, preventing potential hazards․ Once all connections are made, carefully inspect the wiring to ensure all connections are secure and no wires are exposed․ Never use damaged or frayed wires․ After a thorough inspection, restore power to the circuit․ If you are not comfortable performing these steps, consult a qualified electrician to ensure a safe and compliant installation․ Remember, improper electrical work can lead to serious injury or death․
Priming the Pump and Initial System Testing
After completing the electrical connections and ensuring all piping is secure, it’s time to prime the Hayward pool pump․ Refer to your specific pump’s manual for detailed instructions, as priming methods may vary slightly depending on the model․ Generally, priming involves filling the pump’s strainer basket with water․ This initial water charge helps the pump create suction and prevent damage from running dry․ Once the strainer is full, close the lid securely․ With all valves open, turn on the power to the pump․ Listen for any unusual noises – grinding, humming, or excessive vibration might indicate a problem․ If the pump doesn’t start or makes unusual noises, immediately turn it off and check your connections․ If the pump runs smoothly, observe the water flow through the system․ Check for leaks around all pipe joints, and ensure the water flows consistently from the pump to the filter and back․ If you notice any leaks, immediately turn off the pump and tighten the connections․ A small leak can quickly escalate into a major problem․ After a period of operation, check the pump’s temperature․ Excessive heat may indicate a problem with the pump’s operation or a blockage in the system․ If the pump runs smoothly for an extended time, showing consistent water flow and normal temperature, your Hayward pool pump installation is likely successful․ However, ongoing monitoring and regular maintenance are vital to keep the system running efficiently and prevent future issues․ Consult your owner’s manual for recommended maintenance schedules․
Troubleshooting Common Installation Issues
During Hayward pool pump installation, several common problems can arise․ If the motor won’t start, first check the power supply․ Ensure the circuit breaker hasn’t tripped and that the power cord is securely connected to both the pump and a properly grounded GFCI outlet․ If the motor cuts out intermittently, it might be overheating due to insufficient ventilation․ Make sure there’s adequate airflow around the pump motor to prevent overheating․ A humming motor that doesn’t start suggests a possible mechanical issue, such as a seized impeller or a problem with the motor’s internal components․ In this case, professional assistance is recommended․ If the pump won’t prime, double-check all suction and discharge valves to ensure they’re fully open․ Air trapped in the lines can prevent priming․ If the pump leaks, carefully examine all pipe connections and tighten any loose fittings․ Replace worn or damaged gaskets as needed․ Low water flow could indicate a clogged strainer basket, partially closed valves, or a problem within the filter system․ Inspect and clean the strainer basket regularly, ensuring all valves are fully open․ If the issue persists, check the filter system for blockages․ Persistent problems should prompt contacting a qualified Hayward service technician or authorized dealer․ They possess the expertise to diagnose and resolve complex issues, preventing further damage to your pump or the entire pool system․ Never attempt repairs beyond your skill level to avoid further complications or safety hazards․ Refer to your Hayward manual for specific troubleshooting guides related to your model․
Post-Installation Checks and System Balancing
After installing your Hayward pool pump, several crucial post-installation checks are necessary to ensure optimal performance and longevity․ First, visually inspect all connections for leaks․ Check for any signs of water seepage around pipes, fittings, and the pump housing itself․ Tighten any loose connections as needed․ Next, verify that the pump is securely mounted and that there’s sufficient clearance for ventilation․ Poor ventilation can lead to overheating and premature motor failure․ Then, perform a thorough system pressure test․ This helps identify any leaks or blockages within the plumbing system․ Consult your Hayward pump manual for the recommended pressure range․ If the pressure is too high or too low, investigate potential causes such as partially closed valves or restricted flow․ Following the pressure test, run the pump for an extended period—at least 30 minutes—to observe its operation and listen for any unusual noises, such as grinding or squealing․ Any unusual sounds could indicate a mechanical problem․ Finally, fine-tune the system’s hydraulic balance․ This involves adjusting valves to achieve a uniform flow rate throughout the pool’s circulation system․ Refer to your Hayward manual or consult a professional for guidance on system balancing․ Proper system balancing ensures efficient water circulation and prevents strain on the pump and other components․ Regular post-installation checks and maintenance are crucial for ensuring your Hayward pool pump provides years of dependable service․
Understanding Hayward Pump Warranty Information
Understanding your Hayward pool pump’s warranty is crucial for protecting your investment․ Warranty coverage varies depending on the specific pump model and purchase location․ Always retain your proof of purchase, including the original sales receipt and any accompanying documentation․ Hayward warranties typically cover defects in materials and workmanship under normal use and service․ However, damage caused by improper installation, misuse, neglect, or unauthorized repairs is generally not covered․ Carefully review the warranty document for details on the duration of coverage, parts covered, and any exclusions․ Note that installing the pump yourself may void the warranty in certain circumstances, so carefully consider this factor before undertaking DIY installation․ If you encounter any problems with your Hayward pump during the warranty period, contact Hayward customer support or your authorized dealer promptly․ They can help determine if the issue is covered under the warranty and guide you through the necessary steps for repair or replacement․ Providing detailed information about the issue, including any error codes or unusual behavior, will facilitate a quicker resolution․ Be prepared to provide proof of purchase and any relevant documentation․ Proactive maintenance, as outlined in your pump’s manual, can help prevent warranty claims by ensuring the pump operates efficiently and reliably․
Regular Maintenance and Cleaning Procedures
Regular maintenance is key to prolonging the lifespan of your Hayward pool pump and ensuring optimal performance․ The frequency of maintenance will depend on factors such as pool usage and water conditions․ At a minimum, inspect the pump regularly for any signs of leaks, damage, or unusual noises․ Check the pump strainer basket frequently and clean it as needed to remove debris that may clog the pump and reduce efficiency․ Inspect the impeller for wear and tear; excessive wear may indicate a need for replacement․ Periodically, flush the pump with clean water to remove any accumulated sediment or scale buildup․ This helps to maintain its efficiency and prevent damage․ For variable-speed pumps, check the settings regularly and adjust them as needed to optimize energy consumption and water flow․ Always turn off the power supply to the pump before performing any maintenance or cleaning tasks to prevent electrical shock․ Consult your Hayward pump’s manual for specific maintenance recommendations and procedures tailored to your model․ Remember that neglecting regular maintenance can lead to premature pump failure, costly repairs, and potential damage to other pool equipment․ By following a proactive maintenance schedule, you can help ensure your Hayward pool pump provides years of reliable service, keeping your pool clean and enjoyable․
Addressing Potential Problems and Solutions
Even with careful installation, issues can arise․ A common problem is the pump failing to prime․ This often stems from airlocks in the suction line․ Bleed valves, if present, should be opened to release trapped air․ Check for leaks in the suction and discharge lines; replace any damaged seals or gaskets․ If the pump runs but doesn’t circulate water effectively, check the impeller for damage or obstructions․ A humming motor but no pump operation usually indicates a motor problem requiring professional attention․ If the motor overheats, ensure adequate ventilation around the pump and check for any blockages․ Electrical issues are another possibility; verify proper grounding and circuit breaker functionality․ Consult the troubleshooting section of your Hayward pump’s manual for model-specific solutions․ Always turn off the power before investigating any electrical components․ Persistent problems may require contacting a qualified electrician or Hayward service center․ Remember, attempting repairs beyond your expertise could void warranties and potentially cause further damage․ Documenting any issues and your troubleshooting steps aids in effective communication with professionals if needed․ A proactive approach to problem-solving and a thorough understanding of your pump’s operation are crucial for maintaining efficient and safe pool operation․
Contacting Hayward Support and Authorized Dealers
Should you encounter difficulties during installation or experience operational problems after installation, contacting Hayward support or an authorized dealer is recommended․ Hayward offers various support channels, including their website, which may provide troubleshooting guides, FAQs, and contact information; Their website often features downloadable manuals and diagrams specific to your pump model․ Authorized dealers possess in-depth knowledge of Hayward products and can offer expert advice and assistance․ They can troubleshoot complex issues, provide repair services, and offer replacement parts․ Locating an authorized dealer near you is usually possible through the Hayward website’s dealer locator tool․ Before contacting support, gather essential information such as your pump’s model number, serial number, and a detailed description of the problem․ Having photos or videos of the issue can also be beneficial․ Remember to note any steps you’ve already taken to troubleshoot the problem yourself․ Authorized dealers can often schedule service appointments, provide on-site assistance, and address warranty-related questions․ Direct contact with Hayward support may be necessary for complex technical inquiries or warranty claims․ Their support staff can help guide you towards a suitable solution, and in some cases, facilitate communication with an authorized dealer in your area․ Efficient and timely communication is key to resolving any issues and ensuring the longevity of your Hayward pool pump․
Leave a Reply
You must be logged in to post a comment.